Monday, September 5, 2011

Sock Tops or Sculpture?

My friend, Kristi Holt, an avid weaver, showed me her latest creations. I was so intrigued by the textural "ball". Actually, it's the main "ingredient" for her rugs. They are sock tops and that is how they are shipped to her.

I can see this on a table top as a lovely piece of art. I'm sure my cat would enjoy it, also.


The picture above shows the lovely rug and the ball of sock tops. Makes sense when you see them pictured together.


I think this is such a fun photo. It shows place mats very close to being finished.


We took advantage of the great weather and displayed her scarves and table runners outside. Her work is lovely.  It takes a long time just getting her loom set up and ready for her weaving. I'll admit I don't have nearly that amount of patience.


Along with sock tops she showed me a bag of sock bottoms or is it sock toes? Well, you get the idea. I remember doing these as a kid, but my materials weren't as lush as these. Thanks, Kristi, for sharing the results of your talents with us!

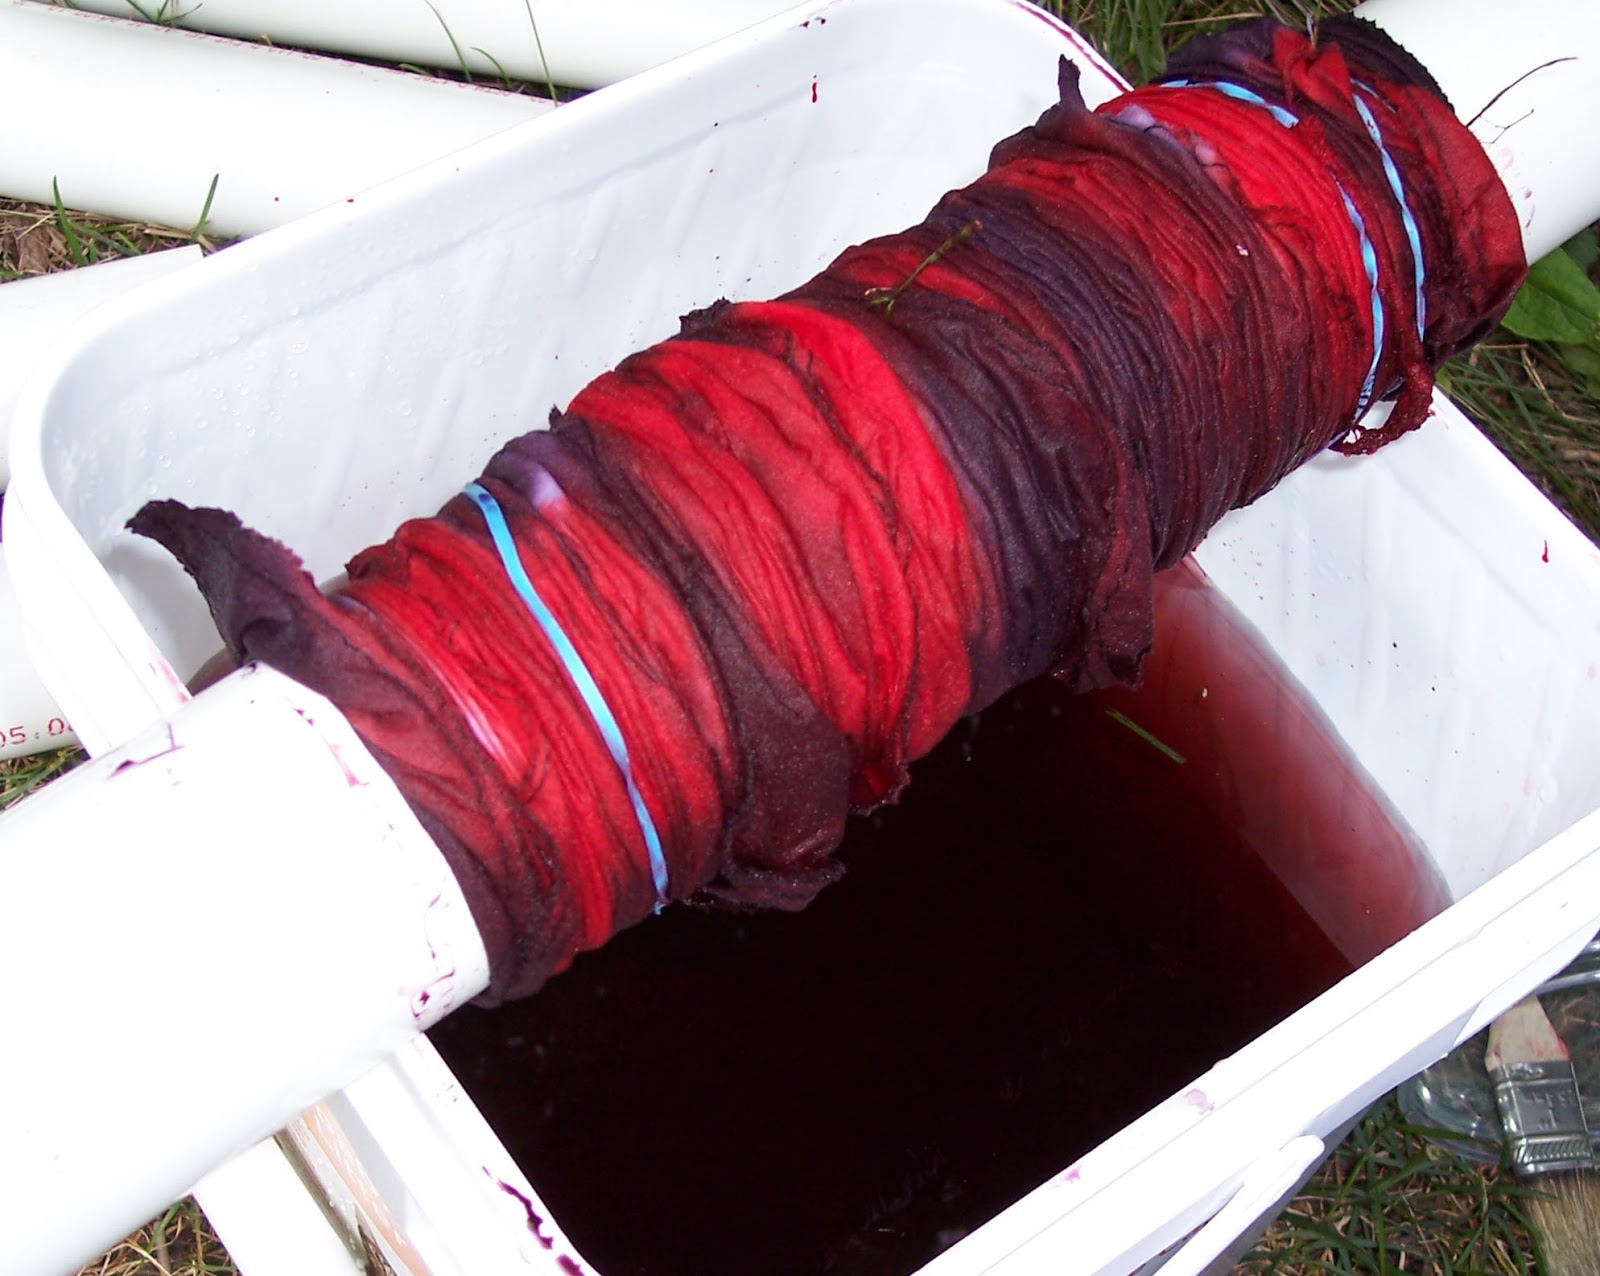
Stay tuned, as they say, for further fabric dyeing adventures from the "Fabulous Fiber Women"!

Tuesday, August 16, 2011

"Project Runway" what were they thinking?

Just a quick post today.

Honestly, I didn't think the subject was fun at all, but more like the show's creative staff saying "well, I don't have a clue so let's do stilts".

But, there's always this Thursday...

What do you think?

Monday, August 8, 2011

"Show & Tell' always inspires us...

to get to those UFOs (you know, unfinished objects).

However, Kate always seems caught up and usually has a few things to share with us.
Kate Hoeruf and her Growth Chart. Beautifully executed!
Another challenge was a portrait done in fabric and close up. I really had fun with this one.  Maria Elkins had an article in Quilting Arts magazine with great instructions. I'm sharing those instructions basically in my own words...have patience.

I chose a high contrast closeup of my husband that was taken in bright sunlight so there were lots of light and dark areas. I photo shopped it to increase the contrasts until there was just light, medium and dark. I did a mirror image of it and printed off about four copies that had an image size of 4" x 6". 

Next I took a red marker and outlined each gray area and kept in mind that I couldn't make them too literal because these had to be cut out. 

Then they were numbered #1 being the lightest, #2 for the medium gray and #3 for the darkest. I could have photo shopped to four shades, but since it was my first attempt I figured three was plenty. (Still do).

Choose three shades of fabric. I avoided obvious prints.

Place the lightest color fabric on top of Timtex or Pelltex (don't use the fusible kind like I did). Your stabilizer will be about 5" x 7".

Using your medium color fabric press Steam-A-Seam2 Lite on to the back.
Now peel off the paper backing. You want it to be slightly tacky.

Using your hand, not your iron, press your paper photo onto the back of the Steam-A-Seam2 Lite. Don't iron it because it will be removed later.

Cut away all the lightest areas using the paper photo as your pattern. Small, sharp scissors are a big help.

You'll remove the paper photo and put your medium color (that was my #2) over the lightest color fabric. Be patient. This sort of looks like a weird puzzle piece. Use just a warm iron to keep them in place.

You'll do the darkest (mine was #3) last. Again, refer to your original printed photo and take your time.

Good news...when every thing is in the right spot you can press it with a hot iron.

I used invisible thread and lowered the feed dogs for some free-motion sewing. Don't forget to add the free-motion foot. By the way, use at least a #14 needle.

Fuse a backing fabric to the back of the stabilizer and trim away the edges so it's 4" x 6".

I did a satin stitch around it twice. I love it and I guess I may make a few more for a "rogue's gallery".

This has already been Photo Shopped to identify the light, medium and dark areas.

 I flipped the photo and marked and numbered my areas. Looks like I made the first cut under the nose.

I layed this on a bright fabric so you could see the process.


Getting to be a bit of a challenge, but fun!


There! all finished and yes, I'm going to do more. I think I will stay with the three contrasts...light, medium and dark.

Judy did a portrait of her cat, very cool, Judy!


Jan did one of her grandson. Love the greens!

Way back, one of our challenges was to create something with at least 80% brown, add sheers and the word "knowledge". I tried and nothing, but nothing came to me, but finally I gave in to the color and came up with a small art quilt that is close to being finished. To my chagrin, I thought the word was "hope". Wrong.

Still have some work to do on this...another UFO!

Well, along with a zillion other tasks, both artsy and those dreaded necessary ones, I will be doing a garment with "back interest" for "Creative Clothing Club" and I think that will call for refashioning a t-shirt I just bought at the local thrift store. So stay tuned for that adventure!

Saturday, August 6, 2011

Can't Get Enough Dyeing...

so we met at Judy's house in the morning before it got too hot and luckily we were also in the shade.

Our group included Kate, Jan, Judy and Debra Danko and me. Debra is very focused and creates wonderful pieces that she uses in her art quilts. Be sure to check her out.
This is only a small example of what we haul around.


Taylor had started a wax batik piece at Dye Camp, using soy wax with Judy's help and I did the dyeing while at Judy's since Taylor is back in Texas. This piece is wet and laying on the grass to dry.


Here it is...all washed, dried and ironed and it's beautiful! I can't wait to send it to her.

A small sampling of some of the work done that morning. It was a good day!

Unfortunately, it's hard to see, but Debra Danko has her Shibori sewn up the side.


Shibori:  for me this is wrapping fabric around a PVC pipe and using rubber bands. There are so many other ways to do it, but I took the easy route.


Something I really need to do is keep notes on my dyeing. Occasionally, there's such a beautiful combination and then I'm guessing what I may have used. So notebook, here I come!

We did some "show & tell" but that will be my next post.


Tuesday, August 2, 2011

Class at Quilting Unlimited...

was great fun!  The Greater Ann Arbor Quilt Guild offers a wonderful variety of classes every other year at the Washtenaw Community College, a perfect venue.

I took "Dyeing 101" from Cindy Geist and had a great day! You know, put me in a class and I'm totally happy.  Cindy is a patient and very informative teacher, not to mention she's multi-talented!

I took my "masterpieces" home in plastic bags and the next morning I spread them out in the yard to dry. I'm showing you the good, semi-good and candidates for re-dyeing.

I'm very comfortable with hand painting fabrics, but dyeing is a whole new adventure!


This was interesting because it's a piece of home dec fabric that was pastels and the white didn't dye, but became a resist.


A nice addition to the yard


This one is a keeper and I'll put in on Etsy


Okay, I just add to add this awesome flower!

In a couple of days the Fabulous Fiber Women will be dyeing fabrics in Judy's backyard. No doubt I will have more pictures of dyed fabric to show you. I hope you can take a few more of these.


Monday, August 1, 2011

Dye Camp...finally

I'll admit my blogging has slowed down lately.  I admire those faithful daily bloggers! You're an inspiration.

I had the good fortune to go to Dye Camp earlier this summer. I signed up for two days and one of those days I was so fortunate to have my 12 year old granddaughter Taylor, join me. She lives in Texas so this was a real treat for me. 

She had never done this before and just jumped right into it. We were all inspired by her and, hopefully next year we can do it again.

Taylor, like the rest of us, is wearing dye, also.


 Yes, we stopped at the grocery store on the way home.


Very intense.


Another colorful creation

I was surrounded by beautiful colors for two days!

Here are more great examples of what was being done.
 This weekend, I took a class in Ann Arbor with Cindy Geist, "Dyeing 101", and had a great time. Of course, when I'm taking a class I always have a great time!


Friday, June 24, 2011

Being With Talented People...

is always such a privilege, I think.

At one of our recent Fab Fiber Woman meetings, we were inspired by "Cloth, Paper, Scissors" magazine's article about embellishing metal.

We brought our various metal oddities, Lumiere paints, embossing powders, and anything else we probably hadn't used in a while.

Sanding was part of the process.


Our finished pieces turned out pretty well and who knows, perhaps we'll add them to art quilts!

Kate showed us two games she had handmade, beautifully I must add, that can be ordered through her website, "Piecesofmeartgifts.com"


This is called "The Great Race", all had made, great for travel and includes all game pieces. Kate has another wonderful game, also available through Kate's website.


Stay tuned for Dye Camp pictures.. two days of fun!


Thursday, June 9, 2011

When It's 95 Degrees in Michigan...

this is what a well fed squirrel does in his spare time.

This is only a couple of feet from my window, but the squirrel wasn't concerned about having his picture taken...he was way too comfortable!

Tuesday, June 7, 2011

Fab Fiber Woman and another challenge...

that was and still is, great fun! We each had to bring a small amount of fabric, a glue stick, scissors and etcetera. And you know the etcetera can be overflowing.

We quickly picked a theme. Flowers. Then the timer was set for 90 minutes, fabrics were dumped on the floor and we began.

Umm, why did I vacuum in advance?

Kate's is finished except for the hanging loops, Judy's is progressing and Jan was sewing on her binding and I will catch a picture of hers next month. I decided, in advance, to make mine small so I stood a chance of actually finishing it. It's 7 x 8". 

I like it enough that I've decided to make lots and join them into one wall hanging. The colors, of course, will not be for the faint of heart.


This has black tulle on top and I free-motion stitched through all of it. Small and simple. The background is a donation of a lovely batik.


Below is Kate's and it probably at least 12 x 12". At the end of the evening she was attaching black binding and it had an almost Asian look.


Here is Judy's project below, also larger than mine.


Actually, by now we know mine was the smallest. I'll catch up with Jan's piece at the next meeting.

Feeling inspired I started a different and again, a small art quilt. The background fabric is a piece of fabric I painted and the tree is an old oak tree in my backyard struggling to survive, but the idea came from a wonderful book "The Complete Photo Guide to Textile Art" by Susan Stein. For me this is a "must have" book filled with so much information and more than 500 large format color photos.

Below is my oak tree art quilt. The finished piece will be about 10 x 14" and will have black binding. The piece is free motion quilted with 40 weight rayon thread in yellow.


No, that's not a blue border, but painter's tape so I could visualize where it should be trimmed. I'm sure my rotary cutter wasn't happy going through the tape.

Below is a close-up of the stitching. I'm pretty casual about this part...no rules and I make sure I remember to breathe.


I'm looking at a really busy rest of the week and weekend, but who knows...I may surprise myself and actually finish this one!


Sunday, June 5, 2011

A Heads Up For an Important Cause...

www.robbiespawprints.blogspot.com

Would you love to be the owner of a great art quilt (or two?) and be supporting a worthy cause at the same time? 

Then check out the above blog and you only have a few days left before the auction ends and who doesn't love an auction?